Thursday, December 15, 2011

Bread - Pita

Pita Bread

A wonderful puffy round pillow of warm steamy tastiness.  There's not much better than fresh made pita bread right out of the hot hot oven.

That's the secret I've found - a hot HOT oven.  450 or 475 degrees.  Rolling to a not too thin thickness is also a good help.  Baking on a hot pizza stone probably doesn't hurt either ;-)  I use the basic boule bread recipe from Artisan Bread in 5 Minutes a Day.  It's often already in my fridge just waiting for me to make pitas (or bread).

First, begin to heat your oven and pizza stone (or inverted cookie sheet) to 450 degrees.  Place a shallow metal pan in the bottom of the oven to heat as well.  Flour a cutting board or counter surface very well.  Take out a golf ball-sized piece of dough and fold the sides under and in to the bottom of the ball until the ball is smooth on top.  Flatten slightly with your hand on the well floured board and roll with a rolling pin until about 1/4-1/3 inch thick.  I've found about 1/4 inch thick works the best.

Once your oven is hot and you have at least 2 pitas rolled out, pour 1 cup warm-hot water in the extra metal pan to create steam.  Put your pitas on the stone and let them cook for about 7 minutes.  They should begin puffing about 3-4 minutes into the bake.

While those are cooking, start rolling the next couple.  2 fit well on my pizza stone.

Remove the baked pitas from the oven with tongs or spatula and put on a cooling rack.  Leave them puffy if you are eating right now, or let cool and gently press the poof to help squish out the hot air/steam and pack in plastic baggies to stay pliable for later.

Home made pitas don't store well - they're much better fresh.

Make up a batch of wonderful pita breads for your family - as a snack, lunch addition or just because they're fun.  Try them with kefir yogurt-cheese, jam, honey, butter and cinnamon, cheddar and swiss, chicken salad... possibilites are endless!

Saturday, December 10, 2011

Kefir - Yogurt Cheese

After you've gotten the hang of making straight kefir and kefir yogurt (kef-gurt??) you can go one step further and make yogurt cheese.  All you do is let the kefir drain for 12-24 hours longer than you need to to make spoonable yogurt.  It makes a wonderfully tangy thick cream cheese-like spread.  We've not flavored ours yet, but it is great with blueberry jam or honey on fresh home made pita bread ;-)

Have you tried making kefir?  What else have you done with your kefir/grains?

Sunday, December 4, 2011

Kefir - Spoonable Yogurt

So, if you've been reading, and you've gotten the hang of plain kefir, you can easily make kefir that's spoonable just like regular yogurt.

After you drain the kefir off the grains the only other step you have to do is to strain the kefir through a coffee filter for 12-24 hours in the fridge to thicken it.  What happens when the kefir is strained through the coffee filter is that the whey seeps out and the kefir thickens into a nice yogurt consistency.  If too much of the whey drips out while it sits over night, just stir a little at a time back in until it's the consistency you wish.

The yogurt will be tart and tangy and may have a good bit of pucker power.  Add in some honey, some vanilla and sugar, some jam - whatever flavors you like and make yourself a great refreshing treat.

Don't discard the whey!  You can use it to soak grains, beans, oatmeal (makes a pleasantly sweet and tangy oatmeal), and even use it to make gjetost or mytost - but I haven't done it yet.  That's one of the next things up on my list.

Monday, November 28, 2011

Mexican Lasagna

All done with turkey?  Why not make tacos - then make a Mexican lasagna with the left overs for another night.

Layer beef, tortillas (corn or flour soft tortillas), diced tomatoes, and cheese just like a regular lasagna in a large 9x13 pan (or 9x9 if you don't have that many left overs).  Bake until hot and bubbly and nicely toasty on top at 350 or so (maybe about 45 mins).  It got nice and crispy cheesy on top.

Serve with sour cream on top.  Yum!

Friday, November 25, 2011

Kefir - Sauerkraut & Kefired Garlic Carrots

In addition to making milk kefir I've started culturing vegetables.  My first go at it was with carrots and garlic.  VERY garlicy as I put in about 6 cloves of garlic, but I enjoyed them.  Then I went and got myself a cabbage and attempted sauerkraut with kefir grains as the acting agent.  Quick, as far as sauerkraut goes apparently, and saltless.

My methods are still a work in progress, although both things I've made have turned out great.  Here's what I've done:

Kefir Carrots and Garlic

1 Tbsp rinsed kefir grains (to get the milk off)
3-6 (or more) cloves of garlic
3-7 carrots - enough to fill a quart sized jar
water
whey to help start the process (optional)

Place about 1/2 of the rinsed kefir grains in the bottom of the jar.  Top with HALF the carrots peeled and cut into 1 inch sized pieces and peeled garlic cloves.  Add in the rest of the kefir grains and the rest of the garlic and carrots on top.  Put in a couple Tbsp of whey if you want to help get the process started, fill the jar with water (filtered preferably) leaving a bit of head room and cap.  Leave at room temperature for 4-6 days.  The mixture should fizz a bit if you loosen the cap (that's the CO2 that the yeast produces).  After 4-6 days place in the fridge for 2-3 days to stop/slow down the fermentation process.

After it's matured in the fridge for a few days take some out and do a taste test.  They should still be crisp, not soggy.  I liked mine rinsed of some of the water/whey mixture to make it slightly less sharp.  With the 6 cloves of garlic it was VERY garlicy.  I ate it both warmed up and straight out of the fridge.  You can take the kefir grains out before you eat, or leave them in and eat them, too.  If heated, the grains get stringy like cheese.

Kefir-kraut

1-2 Tbsp rinsed kefir grains
1 head cabbage
1/2 apple, quartered (or ~1/2 cup apple juice)
water
large glass or ceramic container

Wash cabbage, remove 2 outer leaves and save to the side.  Cut, core and shred the head of cabbage into 1/2 wide pieces or less.  Place ~1 Tbsp rinsed kefir grains in the bottom of the container and top with a layer of cabbage.  Start to bruise and pack the cabbage in tight to the jar.  You need to release some of the juice from the cabbage to get it to start fermenting.  Continue to put in and crush/pack the cabbage shreds into the jar until it's about half full.  Put in the last of the kefir grains and the quartered apple half, core removed.  Top with the remainder of the cabbage, packing and bruising as you go.  When it's all in there with a little head space, fill with water to the top of the cabbage and push down with the saved cabbage leaves.  Weigh down the top leaves with a jar, plate, etc to keep the cabbage submerged under the liquid.  It WILL make more as it begins to ferment.

As with the carrots and garlic, leave on the counter for 4-6 days making sure to monitor that the cabbage all stays under the liquid.  If there gets to be a ton of liquid on top scoop some out so it doesn't overflow. After it's been through it's 4-6 day counter ferment, place in the fridge for a few days to chill and slow down the fermentation process.  Again, the cabbage should still be crisp.

I found this to be very tasty after a 5 day ferment and 3-5 days in the fridge (forget how long).  Not too sharp or tart or sweet.  It's good both straight and cooked.  I used it first in a dish with smoked sausage and potatoes, then again similarly with hotdogs (it was for the kids), and rice.  I'll get to those recipes soon as well.  Promise!

Next I want to make cucumber kimchi - or kefir-chi??  Gotta find my Korean hot pepper sauce...

Kefir cultured vegetables have the same probiotic properties as the kefir yogurt.  So make some up and enjoy!

Thursday, November 24, 2011

Happy Thanksgiving!

Happy Thanksgiving to everyone! 

Hope you have a great day and some great food and great company.

Monday, November 21, 2011

Kefir - the basics

Kefir is a drinkable yogurt style drink.  It's different in that it's a combination of beneficial bacteria and yeast instead of just bacterias, like regular yogurt.  You can make kefir from kefir, as you can regular yogurt, but if you want to make it every day forever (yes you can take breaks), then you're going to need some kefir grains.

I got my grains from my wonderful friend, Hazel.  I'd been intrigued ever since we talked about these things, but it took a good while before I actually got to drive the 4 hours to go get them - and visit for a nice long weekend ;-)  They're easy to take care of and make the most wonderful stuff - kefir!

What I have are milk kefir grains, not water kefir grains.  Supposedly they are different, but I haven't figured out why you couldn't rework milk kefir grains into being water kefir grains eventually.  They eat sugars - lactose in milk, and sugar sugar in water/juice kefir versions.  What comes off the grains is a lightly bubbly, tart and sour drink that's wonderfully probiotic.

It's easy to make.  Just put the grains in a quart sized jar (or pint depending on the amount of grains you have - I have a good 2 cups at the moment in 2 quart sized jars), and dump fresh cold milk on top - yup! right out of the fridge.  (Easier than yogurt, 'eh?)  Cover the jars with a dish towel, they like the dark.  After 12-48 hours, depending on how tart you like your yogurt/kefir, using a fine mesh colander, strain and drain the kefir off the grains - stir to get the most kefir off the grains as you can.  Put the grains back in the jar and add more fresh milk.  Drink the kefir straight off the grains, or refrigerate a few hours to thicken and chill.  Sweeten/flavor if you'd like, and drink.

Some sweeteners I've tried and like in my kefir include:

  • honey
  • vanilla syrup (Torani)
  • orgeat/almond syrup (Torani)
  • peach jam - (MIL made wonderful stuff - it's addicting!)
  • strawberry rhubarb sauce
  • apple butter
  • chocolate sauce
  • triple berry sauce (raspberry, blueberry, blackberry)
If you're interested in making your own kefir, find some grains and have at.  You can likely find someone with grains in the area that's willing to give you some for free, but if you can't look up "The Kefir Lady" - she's out of Ohio and ships every week.  There are many health benefits, or so I've read - go searching online - you'll find a ton.  But it's great for just the taste, and so many uses.  I'll get to some of those eventually.  Happy Kefir-ing!

Friday, November 18, 2011

Kefir

I've gotten into making my own kefir lately.  A wonderful friend gifted me with some of her kefir grains to get me started.  And woah have I gotten started ;-)

If you don't know what kefir is, it's a thin drinkable yogurt-style drink.  Pretty up there in price at the grocery store, and very inexpensive to make at home (just the cost of milk).  Difference between yogurt and kefir is the symbiotic relationship between the beneficial bacteria and yeasts that make up the kefir grains used to make it.  The grains kind of look like small curds of dry cottage cheese or small bits of creamy cauliflower.

So far I've made kefir drink nearly every day (since the end of August), kefir spoonable yogurt, kefired garlic carrots, and kefir-kraut (sauerkraut without salt) - on my second batch as of today.

Wednesday, November 9, 2011

Calendar of Events: November/December 2011

Classes I'm teaching in and around town:

November 15 - Amigurumi at the Mallets Creek AADL, 6pm - http://www.aadl.org/events/list?id=11723

November 16 - Felt Ball Fun at the Pittsfield Branch AADL, 7pm - http://www.aadl.org/events/list?id=11722

December 27 - Advanced Crochet Class: Mobius Strip Scarf, AADL.


December 28 - Mini Monster Stuffies at the Pittsfield Branch AADL, 6:30pm - http://www.aadl.org/events/list?id=11724


December 29 - Origami Basics at the Down Town AADL, 7pm - http://www.aadl.org/events/list?id=11725

All classes through the library are free.  Supplies included.

Tuesday, November 8, 2011

A "New" Vegetable: Romanesco

Ever had romanesco?  I hadn't.  I discovered it on a school field trip to our local Farmer's Market.  It's green, it's spirally, it's firm like cauliflower, tastes like a cross between broccoli and cauliflower and is super yummy!  I took it as a cut vegetable as part of my daughter's school Halloween party.  Getting the kids to try it was a struggle, but the adults did - and went wild over it.  Or maybe it was just my home made dressing... ;-)  Many kids did try it after the adults raved.

Next time you need a new spin on broccoli (or cauliflower), give romanesco a try!

What Can You Make from 2 Large Pork Chops

I often post what I've been making for dinner, etc on my facebook page.  I got asked today to tell how I made a pork stock for my pork & tortilla soup.  Well, it all started with these huge bone in pork chops that were, well, really really salty right out of the store.  So much so that if we smoked them on the grill they tasted like ham.  Not so good when you just want grilled pork chops!

So, I needed to make them into something we could actually eat.  These two giant bone-in pork chops (probably about 1/3-1/2lb each) made probably about 11 or 12 meals total, maybe more.

Night 1:  I used most of 1 pork chop to make some pork fried rice.  Diced up the large part of 1 pork chop and mixed with a couple cups of day old rice, chopped carrots, celery, fried egg, frozen peas, some chopped onion (1/2 large onion diced) and likely some garlic.  A bit of soy sauce once it's all fried up and poof!  Fried Rice.

Night 2:  I took the pork chop that was left, and the bone from the other one and simmered it in a small-ish pot with some water and taco seasoning (no sodium/salt) until it was very tender and falling off the bone.  I then shredded the pork with a couple forks and  made some corn tortillas for tacos.

Night 3: Took the bones from the pork chops and the left over "juice" from simmering the now shredded pork and put in lots of water for a big pot of stock.  Added in celery, carrots, the rest of that onion from the fried rice, more taco seasoning and simmered until it was stock like.  Added in an appropriate amount of salt (not much since it was so salty to begin with), took out the bones and added the shredded pork back in.  I then brought the pot up to boiling and whisked in a few tablespoons of corn meal into the pot to thicken it up... Not too much or you end up with a big thick pot of polenta.  (Wrong ethnicity for this dish. ;-) )  Mixed in a good serving of shredded cheese.  Served this up with baked tortilla strips (cut the left over tortillas from the tacos in strips and baked them), chopped/diced tomatoes, more shredded cheese, and some kefir yogurt (thickened by draining off the whey) - instead of sour cream.

Ate these same 2 pork chops for at least 2 meals of fried rice - for 4, and 3.  Then tacos for 4, and then tortilla soup for 4 and 4 or 5 the next day (forget if DH took it for lunch or not ;-) ).

So, for chops that were way too salty to just eat as chops, they stretched pretty far.  The same idea can be done with a whole chicken.  Must do that again soon.

Apologies for no pictures, I must remember to do that. :/

Wednesday, April 13, 2011

My First Curry!

Well, I took the plunge and attempted a curry.  Amazingly enough it turned out fantastic and I'll definitely be making it again!


Beth's Chicken Curry


Makes 4-6 good sized servings

4 or more Tbsps yellow curry powder (I got mine from By the Pound, mild yellow curry powder)
2-3 Tbsp oil
1 medium onion, diced
3 carrots, large diced
1-2 chicken breasts, cubed
2/3 cup red lentils
A splash 1/2 tsp? Of coconut extract
2 cups chicken stock or 1 bouillon cube and 2 cups water
1/2-2/3 cup yogurt
1/2 cup milk
Several handfuls of frozen peas

In a dry pan toast the curry powder until fragrant.
Add in olive or other oil and stir.  Add in diced onion and cook until slightly softened.  Add in chopped carrots and stir to incorporate.
Start browning the chicken a handful or so at a time in the pan.  Once finished browning mix in with the onions and carrots.
Add in the red lentils and chicken stock.  Stir in the coconut extract.

Simmered a while until thick and the chicken is cooked through, add in the yogurt, milk and peas and cook until the peas are heated through - about 5 mins.

Serve with a HUGE bowl of rice and naan/pita bread.  I cooked 2 + cups and it wasn't enough.


Lightly spicy and a bit sweet - didn't put any sugar in it, so it must have been already in the curry powder.

Kids loved it - once we got them to try it, both of them nearly cleaned their plates!!
 The only picture I got was the carrots and onions :-/  Apologies.

Friday, March 18, 2011

Bean and Tuna Spread/Dip/Sandwich Filling

A filling and tasty dip.  Good with crackers, with veggies or on a sandwich.

1 carrot
1 celery stalk
1 can tuna
1 (15oz) can white northern beans (or other white creamy bean)
Garlic powder or minced garlic cloves
Olive Oil
Salt and Pepper

Cut carrot and celery into chunks and toss in the food processor and pulse until chopped finely, but not pureed.  Scoop out and place in a bowl with drained tuna.  Puree up the beans and garlic cloves until smooth and add in a thin stream of olive oil while the machine is running to help emulsify the bean puree (like making hummus).  Add the pureed beans to the tuna and veggie mixture and salt and pepper to taste.  Spread on crackers, make a sandwich or just dip some veggies.

Refrigerate for a few hours for a firmer spread.

Wednesday, March 16, 2011

Chili Success!

Decided on a nice big pot of chili tonight.  Wasn't sure what I had to put in it, but it turned out great.  Here's what I did:

1lb ground beef, browned
1 28oz can of diced tomatoes
1 28oz can of water (from the tomatoes)
1/2 cup bulgur wheat
2 cans of kidney beans, 14 oz each (1 dark red, 1 light red)
1 bunch red chard, chopped fine in food processor
~1 Tbsp cumin
~1 Tbsp oregano
~1 Tbsp dried minced onion
~1 tsp granulated garlic
Fresh ground Pepper and Sea Salt to taste

I browned the beef with some pepper, garlic and a bit of dried minced onion.  Once browned, I added in the can of tomatoes and water and brought it up to a boil.  Added in all the seasonings and beans.  Once it was simmering I added in the bulgur wheat and the chard.

The chard cooked down (it was pretty small to begin with) the bulgur swelled a bit.  So yummy and every one liked it.

Sunday, March 13, 2011

Quick Jam

Decided I needed some fresh jam the other day to go with some fresh baked bread.  So I quick attempted a batch.  Had to tweak it a bit, but it worked pretty well after all was said and done.

Used about 2 cups of frozen mixed berries (blueberries, raspberries, blackberries)
3 packets of gelatin
1/4-1/3 cup of sugar
little extra water

Brought the frozen mixed berries to a boil and disolved the gelatin in it.  Stirred in the sugar. Poured it into a pint jar and topped it with a plastic cap.  Refrigerate until set.

It was a bit too thick, but I didn't really measure anything much, so I reheated it in the microwave (just for 15 seconds until soft) and put in a bit more water, stirred and it was perfect.  Not too sweet with lots of nice pieces of fruit.

This jam was great with the fresh English Muffins and the home made soynut butter.

Thursday, March 10, 2011

Soy Nut Butter

I made soy nut butter the other day in an attempt to not give myself any mouth sores from the peanut butter.    So far my girls don't seem to have the issue, but if I eat too much peanut butter, well, ouch...

So I had some dried soy beans that I had originally purchased for attempting to make soy milk (which I did, but I still don't like the taste very well).  I took some and put them in a pan with some water and salt and boiled them a bit to soften them.  Once the water had all boiled off I put in a few more dried soy beans and some oil and toasted them all up to a nice golden brown.  They popped a bit like popcorn as their skins split in the heat.

Once they were all brown I dumped them into my food processor and pulsed them until they were a nice fine crumb.  I added a couple Tbsp of sugar and about at tsp of salt and pulsed that in, too.  Once I was happy with the crumbliness I set the food processor to run and added some vegetable oil (not much, just a bit to help with creaminess) then continued to run the machine and added some cool water until the soy beans pureed into a slightly smooth yet chunky "butter".

I scooped the warm soy nut butter out of the processor and put it in containers to chill in the fridge.  For lunch I took it out and made great "peanut butter" and jelly sandwiches.  Then took it a step further and melted some chocolate and made "peanut butter" cups.  Those were a huge hit with the girls (and daddy, too, I think).

Tuesday, March 8, 2011

CSA Farm Share #2

Got our 2nd farm share last week.  Tasty greens - spinach and another green (forget what it is, but it's tasty!)  Also got eggs - fresh from the farm! and 2 types of dried beans.  Light red kidney beans and some tuxedo beans (they look like cows to me - black and white spots).

The girls and I spent the morning and part of the afternoon at the farm on Tuesday sorting beans (4 kinds), playing with the new goat, Allie, and Fin the very big dog.  Allie is living in the house due to some complications, so she's a lot of fun.  When we were there she was only 6 days old - it'll be interesting to see her this week when she's over 2 weeks old and to compare how she's grown.  I should have snapped some pictures of the girls and the goat last week but I forgot :-/  I'll attempt to remember for next time.

Monday, March 7, 2011

English Muffins

Got busy this morning and made some fresh English Muffins.  They're surprisingly easy to make.  Just take a batch of bread dough (I used my go-to everyday bread dough recipe from "Artisan Bread in 5 Minutes a Day") and took small balls (about golf ball-sized) of dough and placed them on a corn meal covered surface.  Sprinkled more corn meal on top and let them rise for 45 mins or so.

Once they're risen, heat up the oven and a cookie sheet or stone to 450 and heat up a skillet on medium (whatever's good for pancakes I've found works well for these too).  Cook English muffins for 4-5 minutes per side in the skillet until lightly browned.  Then put in the oven on your stone or cookie sheet and bake for 5 mins until cooked through.  Cool a bit and stick around the perimeter with a fork.  Pull apart, and enjoy - toasted or not!

These we enjoyed with home made soy nut butter and home made quick jam.  I'll post those recipes later on ;-)

Wednesday, March 2, 2011

Crackers!!

So, I've jumped into the realm of making crackers.  They're easier than I thought and I've already started making my own flavors.  Glad I took the plunge.  My kids love them too.

Here are the 2 recipes I've created:

"Battey Crackers"
(named by my daughter)

2-4 cloves garlic, minced
1 cup whole wheat flour
1 cup unbleached white flour (plus more for dusting)
1 1/2 tsp baking powder
8-10 grinds of black pepper
1 tsp salt
1 Tbsp olive oil combined with
~3/4 cup water
sea salt for sprinkling

Preheat oven to 425 degrees

In your food processor, mince up the garlic.  Change to a dough blade if you have it and combine garlic, flours, baking powder, black pepper and salt.  Pulse until combined.

Pour in 1-2 Tbsp of the water/oil combination and pulse until all combined, continue in this manner until the dough forms a rough ball.

Dump the dough out on a floured board and kneed a bit until all a cohesive ball of dough.  Cut dough ball into 8 pieces.  Roll out each ball of dough, fold over in 3rds and roll again, then once more to help kneed a bit more.  After final folding, roll out to 1/8-1/16 of an inch (I use a pasta roller down to setting 4).  Place on baking sheet and sprinkle with sea salt and pat it into the dough.  Cut with a pizza cutter into cracker shapes.

Bake at 425 for 6 minutes, remove from oven, turn crackers over and cook for another 4-6 minutes until light golden brown.  Repeat with remaining dough.

Cool completely and store for up to 2 weeks in an airtight container (although mine have never lasted more than a week!)

Recipe #2
"Daddy Crackers"
(daddy needed some crackers for work - he hasn't had any yet - hope they last until he gets home!)

1 cup oatmeal
1 cup unbleached white flour
1 1/2 tsp baking powder
1 tsp salt
1 Tbsp olive oil combined with
~3/4 cup water

Grind the oatmeal in your food processor until it makes a nice oat flour with some bits of oats left for texture.  Then, follow the directions above to make these crackers.  Maybe rolling them a BIT thicker as these crackers are pretty thin when baked.

Yummy!

Sunday, January 30, 2011

Glove Elephants

Found this idea at this blog and thought I could make something similar for my girls.  We made a couple of them last week - only took about 15-20 mins with kid help.  Probably wouldn't take as long with out
;-)


Here's what we did:

Materials List

1 cheap stretch glove per elephant
Small ish piece of fleece (or felt) cut into heart shape with the bottom tip cut off
bunch of dried beans to "stuff"
Crochet cotton or thread of similar color to glove for stitching closed
Embroidery thread or Crochet cotton of contrasting color for eyes/mouth

Take 1 cheap stretch glove (we got ours at JoAnns for $1 a pair) and turn the cuff inside.  Fill to the top with dried beans being sure to stuff beans well down into the fingers and thumb.  The thumb will become the trunk; the fingers, the legs.

Once you have the elephant all stuffed to your liking, stitch the opening closed using the blanket stitch and a doubled thread.  I started at the trunk end and went toward the back so that the extra thread at the end (I used crochet cotton) could be poked out the back, tripled back on itself and knotted at both ends to form the tail.

Take some more crochet cotton and stitch on the ears at the top edge where you sewed the body closed.  I just used a regular "in and out" running stitch.

Next use some contrasting embroidery thread or crochet cotton to make some French knot eyes.  I used about 4 French knots per eye just going back and forth between each eye inside to make them.

Lastly, I took the 4 legs and stitched two to one side and two to the other side of the elephant on the bottom.  Took index and ring finger to one side and middle and pinky to the other.  Makes them sit better.

That's it, you're done - now go play with your bean-y elephant.

Thursday, January 20, 2011

New Craft - Temari Balls

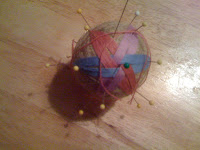
Between Christmas and New Years I attended a dance camp down in Berea, Kentucky.  While I didn't dance much, I did take a craft class that intrigued me.  I learned how to make Temari Balls.  This little embroidered ball from Japan is beautiful and the patterns seem pretty endless.  I made two at camp and have made 3 more since coming home - I've now started my 6th.

Here are some pictures of what I've made so far.


In Progress


Monday, January 17, 2011

CSA Farm Share

So, we just joined a CSA the first of the year.  We just picked up our first share at Portage River Farms on Saturday.  Lots of greens this time of year.  We're hoping it's a great fit for us.

This week we got:

Spinach
Mizspoona
Broccoli Rabe
Romaine

Looking forward to a great salad or two as we were told that greens this time of year (because of the cold) are better raw than cooked.  Sweeter once the cold hits them :-)

So far we've had one huge lovely salad and looking forward to a few more this week.  Kids are learning to eat salad - other than the "good bits" out of the lettuce ;-)

I know they're looking for more people to join their CSA family, if anyone in my area is interested...  More posts as we get further into this whole thing.

Sunday, January 16, 2011

Dinner Tonight - Creamy Pesto Pasta

Ok, again with the no pictures - we ate it all!  But here it goes - quick easy fast dinner.

Boil 1/2 lb noodles (the 3 girls here ate 1/2 lb no problem, if there were more of us we'd have to up the recipe).  Drain noodles and melt in 4 oz (half a brick) of cream cheese.  1/2 cup of spinach pesto (I just pureed up some baby spinach and olive oil, S&P in my new food processor - thanks mom!) and grate in some fresh parmesan cheese.

Yummy!!  And pretty green!