Found this idea at this blog and thought I could make something similar for my girls. We made a couple of them last week - only took about 15-20 mins with kid help. Probably wouldn't take as long with out
;-)
Here's what we did:
Materials List
1 cheap stretch glove per elephant
Small ish piece of fleece (or felt) cut into heart shape with the bottom tip cut off
bunch of dried beans to "stuff"
Crochet cotton or thread of similar color to glove for stitching closed
Embroidery thread or Crochet cotton of contrasting color for eyes/mouth
Take 1 cheap stretch glove (we got ours at JoAnns for $1 a pair) and turn the cuff inside. Fill to the top with dried beans being sure to stuff beans well down into the fingers and thumb. The thumb will become the trunk; the fingers, the legs.
Once you have the elephant all stuffed to your liking, stitch the opening closed using the blanket stitch and a doubled thread. I started at the trunk end and went toward the back so that the extra thread at the end (I used crochet cotton) could be poked out the back, tripled back on itself and knotted at both ends to form the tail.
Take some more crochet cotton and stitch on the ears at the top edge where you sewed the body closed. I just used a regular "in and out" running stitch.
Next use some contrasting embroidery thread or crochet cotton to make some French knot eyes. I used about 4 French knots per eye just going back and forth between each eye inside to make them.
Lastly, I took the 4 legs and stitched two to one side and two to the other side of the elephant on the bottom. Took index and ring finger to one side and middle and pinky to the other. Makes them sit better.
That's it, you're done - now go play with your bean-y elephant.
Sunday, January 30, 2011
Thursday, January 20, 2011
New Craft - Temari Balls
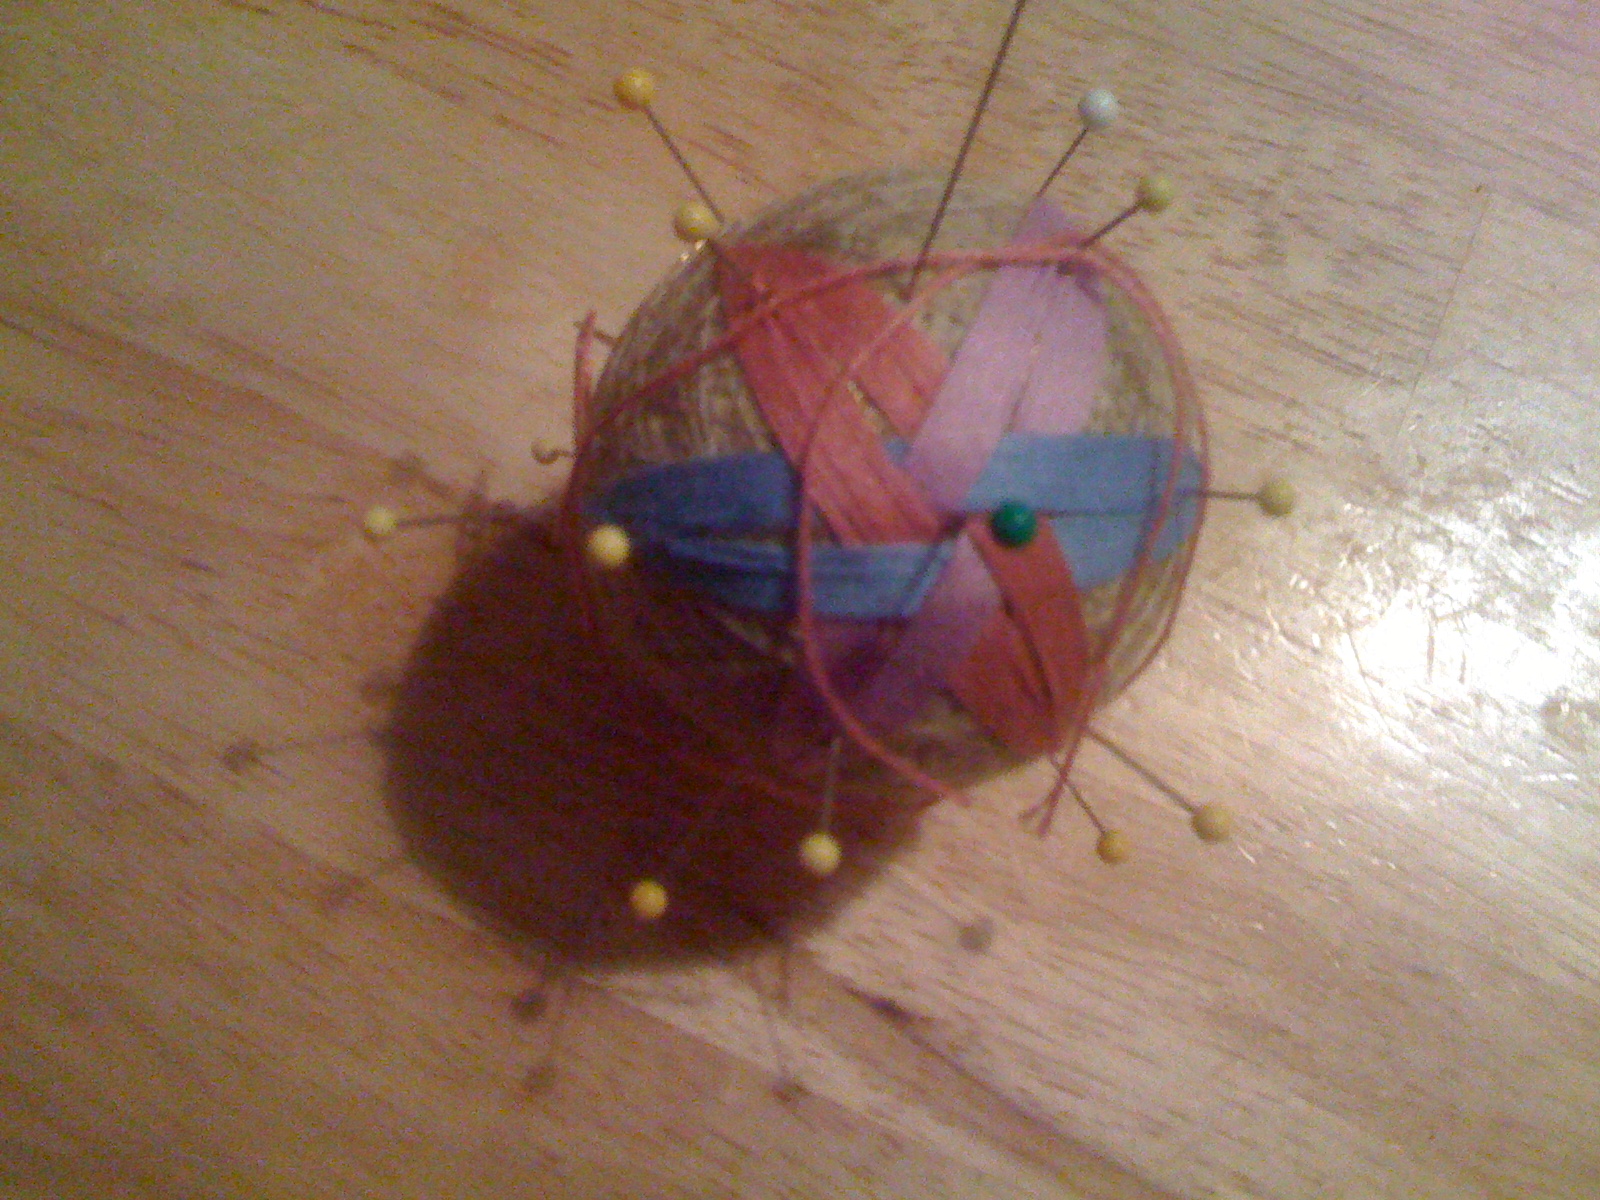
Between Christmas and New Years I attended a dance camp down in Berea, Kentucky. While I didn't dance much, I did take a craft class that intrigued me. I learned how to make Temari Balls. This little embroidered ball from Japan is beautiful and the patterns seem pretty endless. I made two at camp and have made 3 more since coming home - I've now started my 6th.
Here are some pictures of what I've made so far.
Monday, January 17, 2011
CSA Farm Share
So, we just joined a CSA the first of the year. We just picked up our first share at Portage River Farms on Saturday. Lots of greens this time of year. We're hoping it's a great fit for us.
This week we got:
Spinach
Mizspoona
Broccoli Rabe
Romaine
Looking forward to a great salad or two as we were told that greens this time of year (because of the cold) are better raw than cooked. Sweeter once the cold hits them :-)
So far we've had one huge lovely salad and looking forward to a few more this week. Kids are learning to eat salad - other than the "good bits" out of the lettuce ;-)
I know they're looking for more people to join their CSA family, if anyone in my area is interested... More posts as we get further into this whole thing.
This week we got:
Spinach
Mizspoona
Broccoli Rabe
Romaine
Looking forward to a great salad or two as we were told that greens this time of year (because of the cold) are better raw than cooked. Sweeter once the cold hits them :-)
So far we've had one huge lovely salad and looking forward to a few more this week. Kids are learning to eat salad - other than the "good bits" out of the lettuce ;-)
I know they're looking for more people to join their CSA family, if anyone in my area is interested... More posts as we get further into this whole thing.
Sunday, January 16, 2011
Dinner Tonight - Creamy Pesto Pasta
Ok, again with the no pictures - we ate it all! But here it goes - quick easy fast dinner.
Boil 1/2 lb noodles (the 3 girls here ate 1/2 lb no problem, if there were more of us we'd have to up the recipe). Drain noodles and melt in 4 oz (half a brick) of cream cheese. 1/2 cup of spinach pesto (I just pureed up some baby spinach and olive oil, S&P in my new food processor - thanks mom!) and grate in some fresh parmesan cheese.
Yummy!! And pretty green!
Boil 1/2 lb noodles (the 3 girls here ate 1/2 lb no problem, if there were more of us we'd have to up the recipe). Drain noodles and melt in 4 oz (half a brick) of cream cheese. 1/2 cup of spinach pesto (I just pureed up some baby spinach and olive oil, S&P in my new food processor - thanks mom!) and grate in some fresh parmesan cheese.
Yummy!! And pretty green!
Sunday, December 26, 2010
Salt Dough Ornaments
Snowy day here - schools were actually closed yesterday and 223 more today! Decided we needed to make a little Christmas. Broke out a recipe for salt dough and went to town.
The kids found the dough quite hard to work with - it's a very stiff dough especially when cold. Once we kneaded it well, it rolled well and was decently easy to work with. I got out the 100 piece cookie cutter set and we made a nice big mess. (I think we still have some dough to pick up off the floor.)
The one thing we had trouble with is the dough drying out enough. The recipe we used said to bake for 20-25 mins at 300. That was not nearly enough. Even after 35 mins some of the ornaments were not yet "cooked". So they're back in the oven for another 5-10 to continue the drying process.
Here's the salt dough recipe we used. Found in several places on the internet...
4 cups AP flour
1 cup salt
1 1/2 cups water
Kneed until smooth and easy to work with (takes a while!!!!).
Roll out and cut into shapes, use cookie cutters, make hand prints, etc.
Bake 300 for 20+ minutes
Cool and paint with acrylic paints. Spray with varnish to water protect and make them shiny.
The kids found the dough quite hard to work with - it's a very stiff dough especially when cold. Once we kneaded it well, it rolled well and was decently easy to work with. I got out the 100 piece cookie cutter set and we made a nice big mess. (I think we still have some dough to pick up off the floor.)
The one thing we had trouble with is the dough drying out enough. The recipe we used said to bake for 20-25 mins at 300. That was not nearly enough. Even after 35 mins some of the ornaments were not yet "cooked". So they're back in the oven for another 5-10 to continue the drying process.
Here's the salt dough recipe we used. Found in several places on the internet...
4 cups AP flour
1 cup salt
1 1/2 cups water
Kneed until smooth and easy to work with (takes a while!!!!).
Roll out and cut into shapes, use cookie cutters, make hand prints, etc.
Bake 300 for 20+ minutes
Cool and paint with acrylic paints. Spray with varnish to water protect and make them shiny.
Saturday, December 25, 2010
Tuesday, December 14, 2010
Dinner Tonight: Quick Stir Fry
I don't usually like stir fry, but I've finally happened upon a recipe that I enjoy making, and eating. It's quick, it's easy and adaptable.
Ingredients:
1-2 chicken breast sliced thin (or beef, or pork, or whatever protein you choose)
2-3 small zucchini sliced in moons
2-3 carrots sliced in circles/moons
2-3 ribs of celery
pepper
garlic powder
1/4 cup soy sauce
1/2-3/4 cup water
1 Tbsp cornstarch
Optional ingredients:
chopped garlic
mushrooms
onions
spinach, chard, collards or other greens
Slice and chop all ingredients so they're ready to go. Brown chicken until nearly cooked through. Add in chopped garlic, onions, (if using) and cook until soft. Add in the rest of the chopped vegetables and the cornstarch, soy sauce and water (mixed into a slurry). Cook until vegetables are soft, or leave them a bit crunchy. Season with pepper and garlic powder to taste.
Serve over rice or rice noodles. Or just eat alone - it's all good.
Ingredients:
1-2 chicken breast sliced thin (or beef, or pork, or whatever protein you choose)
2-3 small zucchini sliced in moons
2-3 carrots sliced in circles/moons
2-3 ribs of celery
pepper
garlic powder
1/4 cup soy sauce
1/2-3/4 cup water
1 Tbsp cornstarch
Optional ingredients:
chopped garlic
mushrooms
onions
spinach, chard, collards or other greens
Slice and chop all ingredients so they're ready to go. Brown chicken until nearly cooked through. Add in chopped garlic, onions, (if using) and cook until soft. Add in the rest of the chopped vegetables and the cornstarch, soy sauce and water (mixed into a slurry). Cook until vegetables are soft, or leave them a bit crunchy. Season with pepper and garlic powder to taste.
Serve over rice or rice noodles. Or just eat alone - it's all good.
Wednesday, December 1, 2010
Bandana Pants Tutorial
My girls were in need of some new pants and shorts for summer - so I started in making Bandana Pants. They're cool, they're comfortable and definitely fashionable! My girls love them - and enjoy choosing their colors of bandana for their new duds.
Pants and shorts are both easy - I'll include a quick tutorial for each.
For Pants:
2 bandanas
elastic
sewing machine
scissors
Line the bandanas up so that they are square with each other. My bandanas are 22 inches square - ish. Sometimes they're not quite square, depending on what brand/how expensive, etc. I tend toward the cheaper ones if possible. But for bottoms you want thicker bandanas.
Fold the lined up bandanas in half lengthwise (hot dog style for you school teachers). Measure 1 inch in from the side edge (NOT THE FOLD) and about 10-12 inches down depending on your child's crotch measurement. For a 1-3 yo I'd use 10"-11", 11"-12" for 4 and up. I make a small cut with my scissors at each spot then connect the two with a J shaped cut.
Unfold the pants and sew up both Js using your machine. Zig zag or surge over the edge if desired to finish it off inside.
Fold the pants now so that the bottoms of each leg of the pants line up (each bandana is 1 leg). Sew from the bottom of 1 leg to the bottom of the other all the way around the crotch of the pants. Now they're starting to look like pants!
Roll down the top of the pants approximately 3/4 of an inch and stitch leaving a 1-2" space unstitched to tread in the elastic for the waistband. Thread the 1/2 inch elastic through the casing and stitch ends together. Stitch opening closed.
For Shorts:
1 Bandana needed
elastic
sewing machine
scissors
Start by cutting the bandana in half so that you have two identical rectangles, cut edges will form the waist band of the shorts.
Follow directions for pants above. The crotch/inside leg seam will only be 1-2 inches long as to leave enough room for the bottom in the shorts.
No need to hem the bottom of the pants, they've already got that great rolled edge from the edge of the bandana.
Now go try these on your little one and let them get their groove on!
Pants and shorts are both easy - I'll include a quick tutorial for each.
For Pants:
2 bandanas
elastic
sewing machine
scissors
Line the bandanas up so that they are square with each other. My bandanas are 22 inches square - ish. Sometimes they're not quite square, depending on what brand/how expensive, etc. I tend toward the cheaper ones if possible. But for bottoms you want thicker bandanas.
Fold the lined up bandanas in half lengthwise (hot dog style for you school teachers). Measure 1 inch in from the side edge (NOT THE FOLD) and about 10-12 inches down depending on your child's crotch measurement. For a 1-3 yo I'd use 10"-11", 11"-12" for 4 and up. I make a small cut with my scissors at each spot then connect the two with a J shaped cut.
Unfold the pants and sew up both Js using your machine. Zig zag or surge over the edge if desired to finish it off inside.
Fold the pants now so that the bottoms of each leg of the pants line up (each bandana is 1 leg). Sew from the bottom of 1 leg to the bottom of the other all the way around the crotch of the pants. Now they're starting to look like pants!
Roll down the top of the pants approximately 3/4 of an inch and stitch leaving a 1-2" space unstitched to tread in the elastic for the waistband. Thread the 1/2 inch elastic through the casing and stitch ends together. Stitch opening closed.
For Shorts:
1 Bandana needed
elastic
sewing machine
scissors
Start by cutting the bandana in half so that you have two identical rectangles, cut edges will form the waist band of the shorts.
Follow directions for pants above. The crotch/inside leg seam will only be 1-2 inches long as to leave enough room for the bottom in the shorts.
No need to hem the bottom of the pants, they've already got that great rolled edge from the edge of the bandana.
Now go try these on your little one and let them get their groove on!
Thursday, November 18, 2010
Idea of the Day: Design Notebook
I've started my own design notebook to keep my design ideas in one place. I just grabbed a simple 50 cent notebook from the "back to school" sale and got to work. Some of them are original ideas, several are ideas I've made or plan to make that are from others sites around the interwebs.
I've drawn little graphics of the finished object (trust me, these are very rough drawings!) Also illustrations on how to draw the pattern pieces, and how to cut out the bits and assemble. Scribbled some directions and tips and tricks on what to do once you get all the pieces cut out...
Might as well keep these ideas for later, and best I not forget what I did!
Happy designing!
I've drawn little graphics of the finished object (trust me, these are very rough drawings!) Also illustrations on how to draw the pattern pieces, and how to cut out the bits and assemble. Scribbled some directions and tips and tricks on what to do once you get all the pieces cut out...
Might as well keep these ideas for later, and best I not forget what I did!
Happy designing!
Wednesday, October 20, 2010
Dinner Tonight
Ok, so it was dinner LAST night, but still... It was yummy - had to post!
Ingredients:
3 strips bacon, chopped (already cooked is fine)
2 chicken breasts, sliced into chunks
1/2 onion, chopped (or dried minced works too)
1 good sized bunch rainbow chard, chopped
2 tomatoes, chopped
1 can mushrooms
2 eggs
1/2 cup milk or cream
Garlic
Salt & Pepper
1/2 cup or so of Parmesan cheese
8oz of spaghetti or linguine - hot/freshly cooked
Boil the water for the pasta - and plunk the pasta in!
In a large skillet - fry chopped bacon until crispy - add in the chicken bits and brown up until cooked through. Add in the onions and garlic, sprinkle with S&P.
Once the chicken and bacon are cooked through, add in the chard, tomatoes and mushrooms. Toss, mix, stir until chard is wilted and everything is hot - I had a hard time getting everything to stay in the pan - this makes a lot of food!
While the pasta is finishing cooking and the chard and chicken are getting all hot and happy, whisk together 2 eggs and the milk/cream with some S&P. Drain the pasta and place back in the hot pot. Toss quickly with the egg mixture until the noodles are well coated and the eggs have cooked on the hot pasta. Add the pasta/egg mixture to the chicken and veggies, add in the Parmesan cheese and toss together well.
Ingredients:
3 strips bacon, chopped (already cooked is fine)
2 chicken breasts, sliced into chunks
1/2 onion, chopped (or dried minced works too)
1 good sized bunch rainbow chard, chopped
2 tomatoes, chopped
1 can mushrooms
2 eggs
1/2 cup milk or cream
Garlic
Salt & Pepper
1/2 cup or so of Parmesan cheese
8oz of spaghetti or linguine - hot/freshly cooked
Boil the water for the pasta - and plunk the pasta in!
In a large skillet - fry chopped bacon until crispy - add in the chicken bits and brown up until cooked through. Add in the onions and garlic, sprinkle with S&P.
Once the chicken and bacon are cooked through, add in the chard, tomatoes and mushrooms. Toss, mix, stir until chard is wilted and everything is hot - I had a hard time getting everything to stay in the pan - this makes a lot of food!
While the pasta is finishing cooking and the chard and chicken are getting all hot and happy, whisk together 2 eggs and the milk/cream with some S&P. Drain the pasta and place back in the hot pot. Toss quickly with the egg mixture until the noodles are well coated and the eggs have cooked on the hot pasta. Add the pasta/egg mixture to the chicken and veggies, add in the Parmesan cheese and toss together well.
Fleece Pants - TUTORIAL!
My first tutorial on here - yay!!!
Broke out the Ikea fleece blankets that had been used for another project (fleece jackets for the family a few years ago) and decided to make some fleece pants for the kids. I figured the ruffle/design on the bottom was great instead of a hem. Cute, quick and easy. 3 pairs cut and 2 finished in the space of 45 minutes (wanted to get to the blog tutorial, so I didn't finish the 3rd pair).
Materials:
1 fleece Ikea blanket - your choice of color!
3/4 inch elastic - approximately 22 inches per pair of pants depending on the waist size
scissors, thread, sewing machine, tape measure
Fold the blanket in half so that both "fancy" edges are lined up with one another and the side edge is straight. Cut a large rectangle out of both thicknesses of fleece approximately 20-30 inches wide and 20-30 inches tall. You should measure how long and wide you need the pants to be on the child that you are making these for. If you are making them for a 18 month old to 3yo, 22-24 inches square should be more than enough. I made mine 24 wide x 20 tall and they're a bit too big.
Once you have your square of fabric, fold the fabric in half lengthwise so that the "fancy" edge is on the bottom. You will cut a J out of the side of the fabric approximately 10 inches long by 1 inch deep.
Once you've cut your "J", unfold the rectangle of fabric, keeping the "Js" lined up on each side. Stitch the two "Js" but not the side seams.
Once the "Js" are stitched, reach in the top of the pants and align the two seams to one another. Line up the bottom of each leg and stitch one long seam from the end of one leg, to the end of the other leg - this forms the pant legs.
Stitch the waist band casing approximately 1 inch in from the top leaving a space to thread elastic through the casing.
Thread elastic and stitch securely together. Finish off and stitch closed the elastic casing. Turn right side in and try 'em on!
They're a bit long, but she'll grow this winter, I'm sure. Didn't want them to not fit in a month when it's just starting to get cold. These will also be great when she's much bigger for some nice fleecy shorts :-/
As I mentioned, I got 3 pairs out of one fleece Ikea blanket - one very long pair, this pair and a wider pair. Two have the fancy edge, the 3rd pair (long pair) is the "middle" of the blanket folded width wise on top of itself and cut to make 2 rectangles before proceeding with cutting as above.
Tutorial needs some work, I think, but for now, I hope you get the gist of it. Ask in comments if you have questions. I'll be posting more soon, I hope!
Broke out the Ikea fleece blankets that had been used for another project (fleece jackets for the family a few years ago) and decided to make some fleece pants for the kids. I figured the ruffle/design on the bottom was great instead of a hem. Cute, quick and easy. 3 pairs cut and 2 finished in the space of 45 minutes (wanted to get to the blog tutorial, so I didn't finish the 3rd pair).
Materials:
1 fleece Ikea blanket - your choice of color!
3/4 inch elastic - approximately 22 inches per pair of pants depending on the waist size
scissors, thread, sewing machine, tape measure
Fold the blanket in half so that both "fancy" edges are lined up with one another and the side edge is straight. Cut a large rectangle out of both thicknesses of fleece approximately 20-30 inches wide and 20-30 inches tall. You should measure how long and wide you need the pants to be on the child that you are making these for. If you are making them for a 18 month old to 3yo, 22-24 inches square should be more than enough. I made mine 24 wide x 20 tall and they're a bit too big.
Once you have your square of fabric, fold the fabric in half lengthwise so that the "fancy" edge is on the bottom. You will cut a J out of the side of the fabric approximately 10 inches long by 1 inch deep.
Once you've cut your "J", unfold the rectangle of fabric, keeping the "Js" lined up on each side. Stitch the two "Js" but not the side seams.
Once the "Js" are stitched, reach in the top of the pants and align the two seams to one another. Line up the bottom of each leg and stitch one long seam from the end of one leg, to the end of the other leg - this forms the pant legs.
Stitch the waist band casing approximately 1 inch in from the top leaving a space to thread elastic through the casing.
Thread elastic and stitch securely together. Finish off and stitch closed the elastic casing. Turn right side in and try 'em on!
They're a bit long, but she'll grow this winter, I'm sure. Didn't want them to not fit in a month when it's just starting to get cold. These will also be great when she's much bigger for some nice fleecy shorts :-/
As I mentioned, I got 3 pairs out of one fleece Ikea blanket - one very long pair, this pair and a wider pair. Two have the fancy edge, the 3rd pair (long pair) is the "middle" of the blanket folded width wise on top of itself and cut to make 2 rectangles before proceeding with cutting as above.
Tutorial needs some work, I think, but for now, I hope you get the gist of it. Ask in comments if you have questions. I'll be posting more soon, I hope!
Wednesday, October 13, 2010
New Dresses
Made 3 dresses in the same style for the girls and I. The patterns are all basically the same, just in different sizes. I have yet to get pictures of mine and the 3yos dress, but here's the little one. Looks good if I do say so myself. Bonnets to go with them too... More on those later!
Finally another recipe! Yummy Chicken and Veggies
It's been waaaay too long since I've written any blog posts. Life has been happening. The cooking goes on.
Made a great recipe last week - had to share, especially after my MIL requested the recipe from me TWICE!
Ingredients:
Chicken Pieces (enough to feed the fam)
1/2 large onion chopped
3-5 carrots, chopped
3 stalks celery, chopped
flour
butter
2 cups chicken stock (or 2 cups water and 1 bouillon cube)
Oil for the pan
Heat oil in a large dutch oven - brown chicken pieces until nicely browned. Remove from pan. Saute vegetables in a little more oil until onion is a bit browned and the other veggies are softened a bit. Either remove the veggies or just continue on. Add in ~3Tbsp flour and mix in well to the veggies until all the oil is soaked into the flour and the pot is rather dry. Then add in the 2 cups of chicken stock (or bouillon and water) whisking as you go to break up lumps until it's a nice smooth sauce. Add in salt & pepper and any other seasonings now and mix well. Add the vegetables and chicken back in and simmer on the stove - or in a 350 degree oven - until the chicken is done.
Serve over rice or mashed potatoes would be tasty too.
Feeds 4-6 depending on how much chicken was cooked.
Made a great recipe last week - had to share, especially after my MIL requested the recipe from me TWICE!
Ingredients:
Chicken Pieces (enough to feed the fam)
1/2 large onion chopped
3-5 carrots, chopped
3 stalks celery, chopped
flour
butter
2 cups chicken stock (or 2 cups water and 1 bouillon cube)
Oil for the pan
Heat oil in a large dutch oven - brown chicken pieces until nicely browned. Remove from pan. Saute vegetables in a little more oil until onion is a bit browned and the other veggies are softened a bit. Either remove the veggies or just continue on. Add in ~3Tbsp flour and mix in well to the veggies until all the oil is soaked into the flour and the pot is rather dry. Then add in the 2 cups of chicken stock (or bouillon and water) whisking as you go to break up lumps until it's a nice smooth sauce. Add in salt & pepper and any other seasonings now and mix well. Add the vegetables and chicken back in and simmer on the stove - or in a 350 degree oven - until the chicken is done.
Serve over rice or mashed potatoes would be tasty too.
Feeds 4-6 depending on how much chicken was cooked.
Tuesday, April 27, 2010
Bread Baking
I've been baking sourdough breads lately. Lots and lots of sourdough bread. I started my own starter by letting the starter develop it's own yeast and grab what it could out of the air. Neat process. Takes a bit of forethought in the baking as it has taken up to 17 hours for the dough to double in size. But I've found that now that the starter is older it doesn't take as long. This batch did what I wanted for doubling in about 4 hours! I think that's a record. The rolls I'm making currently are light and tasty - when I baked the first batch a 2nd batch was immediately requested because the first is awaiting a party... Lightly sweet with a soft texture.
I've also been experimenting with pasta. Made egg pasta spaghetti last night with an alfredo-style sauce with chicken and mushrooms. Quite tasty. The girls and I will be having it again for dinner tonight. Today I made ravioli style pasta for lunch. Stuffed with cottage cheese flavored with garlic, oregano and basil. It turned out too runny in the filling. I think it needs to be drier. But the pasta was lovely, light and tender. I'll toss some recipes up when I have a few more minutes. For now I'm getting ready for a b'day party this weekend. Little one is turning 1!!!
Monday, March 15, 2010
Bok Choy Stir Fry
2 Tbps vegetable oil
1 lb chicken or tofu
3-4 green onions (or 1 medium onion)
5 or more bunches of baby bok choy
2 Tbsp Terryakki sauce
2 Tbsp soy sauce
2-4 Tbsp Olive oil
1/4 cup peanuts (optional)
Dice chicken or tofu and white parts of the onion. Saute in hot oil until browned and mostly cooked through.
Slice baby bok choy into bite sized pieces (washed well) and add on top of chicken or tofu mixture. Add in sauces and olive oil and mix well. Cook until bok choy is slightly wilted and heated through.
Garnish with green parts of the onion and peanuts (if using)
Serve over rice or by itself.
1 lb chicken or tofu
3-4 green onions (or 1 medium onion)
5 or more bunches of baby bok choy
2 Tbsp Terryakki sauce
2 Tbsp soy sauce
2-4 Tbsp Olive oil
1/4 cup peanuts (optional)
Dice chicken or tofu and white parts of the onion. Saute in hot oil until browned and mostly cooked through.
Slice baby bok choy into bite sized pieces (washed well) and add on top of chicken or tofu mixture. Add in sauces and olive oil and mix well. Cook until bok choy is slightly wilted and heated through.
Garnish with green parts of the onion and peanuts (if using)
Serve over rice or by itself.
Sunday, February 28, 2010
Leek and Potato Soup
I got a big bunch of leeks from my food co-op yesterday and my DH grabbed me a bag of potatoes, so it's time to attempt my first leek and potato soup.
Ingredients:
6-8 Potatoes, peeled & cut into pieces
1 large leek
2 ribs celery
2 carrots
salt
pepper
I started with a pot of boiling salted water and put in some cubed peeled and cubed unpeeled potatoes. Should have cooked the unpeeled ones first so I could have pureed the soup easily before adding in the "chunky" veggies. Live and learn.
Anyway, cook the potatoes until they start to get soft, then add the washed and chopped leeks. Then puree after it's been cooking a while and the leeks are soft.
Toss in celery and carrots cut up small. Add S&P to taste. Since the water was already salted with a good tsp of salt, I didn't need any more.
That's it. Easy, simple, tasty, vegan even!
Ingredients:
6-8 Potatoes, peeled & cut into pieces
1 large leek
2 ribs celery
2 carrots
salt
pepper
I started with a pot of boiling salted water and put in some cubed peeled and cubed unpeeled potatoes. Should have cooked the unpeeled ones first so I could have pureed the soup easily before adding in the "chunky" veggies. Live and learn.
Anyway, cook the potatoes until they start to get soft, then add the washed and chopped leeks. Then puree after it's been cooking a while and the leeks are soft.
Toss in celery and carrots cut up small. Add S&P to taste. Since the water was already salted with a good tsp of salt, I didn't need any more.
That's it. Easy, simple, tasty, vegan even!
Sunday, February 14, 2010
Happy Valentines Day!
Just stopping by to wish you all a Happy Valentines Day! Hope everyone has a wonderful love-filled day!
Sunday, January 17, 2010
Granola with Steel Cut Oats
I got adventurous this last week and decided to attempt to make granola cereal with steel cut oats. I did some online research into the idea to see if anyone else had done it, and someone said they had. So on I went to attempt my steel cut oat granola. Here's what I came up with:
Ingredients:
6-8 cups steel cut oats
1/4 cup oil
1/2 - 3/4 cup honey
1/2 - 3/4 cup brown sugar
2 cups chopped mixed salted nuts
1 1/2 cups chopped dried apples
1/4 cup ground flax seeds
1/2 cup dried currents (or raisins, but I had currents)
Mix up the oats and the oil and spread them in a pan and toast in a 350 degree oven until lightly toasted, stirring every 10 minutes.
Heat in a small sauce pan the honey and brown sugar until liquid and combined.
Once the oats come out of the oven, lower the oven to 250 degrees.
In a large bowl combine the oats, honey/sugar mixture, nuts, apples, flax, currents - or any other dried fruit and nuts. Stir until everything is completely coated. Spread in a 9X13 pan or a rimmed baking sheet and bake for 45-60 minutes until very lightly browned. Remove from oven and allow to cool to warm, then cut into pieces and allow to cool completely in the pan.
To use, either break into pieces and eat dry, or top with milk for a cold cereal. My favorite is to put a chunk in a bowl, top with milk and zap it in the microwave for 3 minutes. Stir and let sit for 5 minutes or so until it gets thick - eat!
Happy Eating!
Ingredients:
6-8 cups steel cut oats
1/4 cup oil
1/2 - 3/4 cup honey
1/2 - 3/4 cup brown sugar
2 cups chopped mixed salted nuts
1 1/2 cups chopped dried apples
1/4 cup ground flax seeds
1/2 cup dried currents (or raisins, but I had currents)
Mix up the oats and the oil and spread them in a pan and toast in a 350 degree oven until lightly toasted, stirring every 10 minutes.
Heat in a small sauce pan the honey and brown sugar until liquid and combined.
Once the oats come out of the oven, lower the oven to 250 degrees.
In a large bowl combine the oats, honey/sugar mixture, nuts, apples, flax, currents - or any other dried fruit and nuts. Stir until everything is completely coated. Spread in a 9X13 pan or a rimmed baking sheet and bake for 45-60 minutes until very lightly browned. Remove from oven and allow to cool to warm, then cut into pieces and allow to cool completely in the pan.
To use, either break into pieces and eat dry, or top with milk for a cold cereal. My favorite is to put a chunk in a bowl, top with milk and zap it in the microwave for 3 minutes. Stir and let sit for 5 minutes or so until it gets thick - eat!
Happy Eating!
Friday, January 15, 2010
New Version of Vegan Mac and "Cheese"
Upon my child asking for mac and cheese for the 3rd time in 2 days, I decided to try a vegan version of my own devising. For the sauce I cooked up some red lentils and pureed them with some cashews, olive oil and some of the pasta cooking water until it was smooth. Salt and peppered the sauce to taste (we like lots of pepper in our mac and cheese sauce). Then I put it over the cooked noodles. Looks just like home-made cheese sauce, has no dairy in it.
I think next time, though I'll either cook or at least soak the cashews to make them blend a bit smoother. It was good for a quick lunch.
Happy Eating!
I think next time, though I'll either cook or at least soak the cashews to make them blend a bit smoother. It was good for a quick lunch.
Happy Eating!
Saturday, January 9, 2010
Awesome Tutorial on How to Make Home Made Stickers
Found this at SkipToMyLou and had to share it. How to make your own lick and stick stickers from any paper. Great idea for magazines, scrap book paper, wrapping paper, etc.
Home Made Stickers
Home Made Stickers
Subscribe to:
Posts (Atom)